Hi all,
Here is a run through of how I made the diorama. Some parts I forgot to take good photos of but I’ll do my best! I got a lot of inspiration from Ashmimi’s beach tutorial for the sandy underwater part and the resin river at the top. This website Storm the Castle is lots of fun and I used the tips from their waterfall tutorial (and many related youtube tutorials) to make my waterfall (with a few adjustments as unfortunately we don’t have the same product here in Australia).
First of all I had to track down the right sort of foam. This was really difficult!! In the end I found some XPS foam insulation from Bunnings (large hardware chain). It’s a huge block (about 1.2mx0.6m) but it’s fabulous to work with for this sort of stuff. Similar foam in art shops is CRAZY expensive.
I started off by splitting it into blocks and working out how many layers I’d need to get the height I wanted.


Then I drew a rough outline of where I wanted the water to be, where I wanted the waterfall to “land” in the water.

Then I started hacking away! This would have been a heck of a lot easier with proper foam cutting hot wire tools but I just used some kitchen knives. This made it extra messy as lots of little bits of foam went everywhere. I was COVERED in foam confetti after a bout of sculpting and shaping hahaha.

At this point I had the basic shape of the diorama and glued these layers together with lots of PVA glue. This took a few days to set 100%
The next tricky item to find was a suitable water surface. I didn’t have a piece of clear Perspex/plastic that was big enough for my grotto or rigid enough to stay straight and hold itself up. I ended up finding a giant sheet of clear Perspex at Bunnings in the roofing section! This stuff was expensive for what it was but I was really getting desperate. It is actually fantastic to work with and I have heaps left over.

I used the foam cutout from my water surface to get a rough shape for my water surface.


About 5mm below the ground level of the foam I cut a groove into the foam with a sharp knife so the plastic would just slide into place as the surface of the water.

In the photo above you can see it’s getting dark – the sun is setting. I was meant to be helping with the kids’ bath and dinner! My wonderful long-suffering hubby. LOL. The perspex was coated with a thin removable plastic sheet on each side so I could mark where I wanted the swim hole and waterfall to go etc. This would just peel off later.
I then used cheap spakfilla to try and smooth the walls of the grotto and fill various defects in the foam I wanted smooth (thanks IcePixie for this awesome tip!!). I forgot to take a photo of this step but you can see the white dried spakfilla in the next photo. I also used some sandpaper to smooth the base of the foam and any areas that looked particularly hacked and messy.
I used cheap PVA glue to coat the underwater areas and sprinkled with sand. I then sprayed with watered down glue in a spray bottle to seal it and then did a couple more layers of sand. I was worried this would shed grains of sand everywhere but finishing it off with a sprayed layer of watered down PVA glue really seals it well and stops that happening. I wasn’t sure at this stage if I’d keep it sand-coloured and make the water surface blue, or paint the sand blue and keep the water surface clear (I ended up doing the second option!).

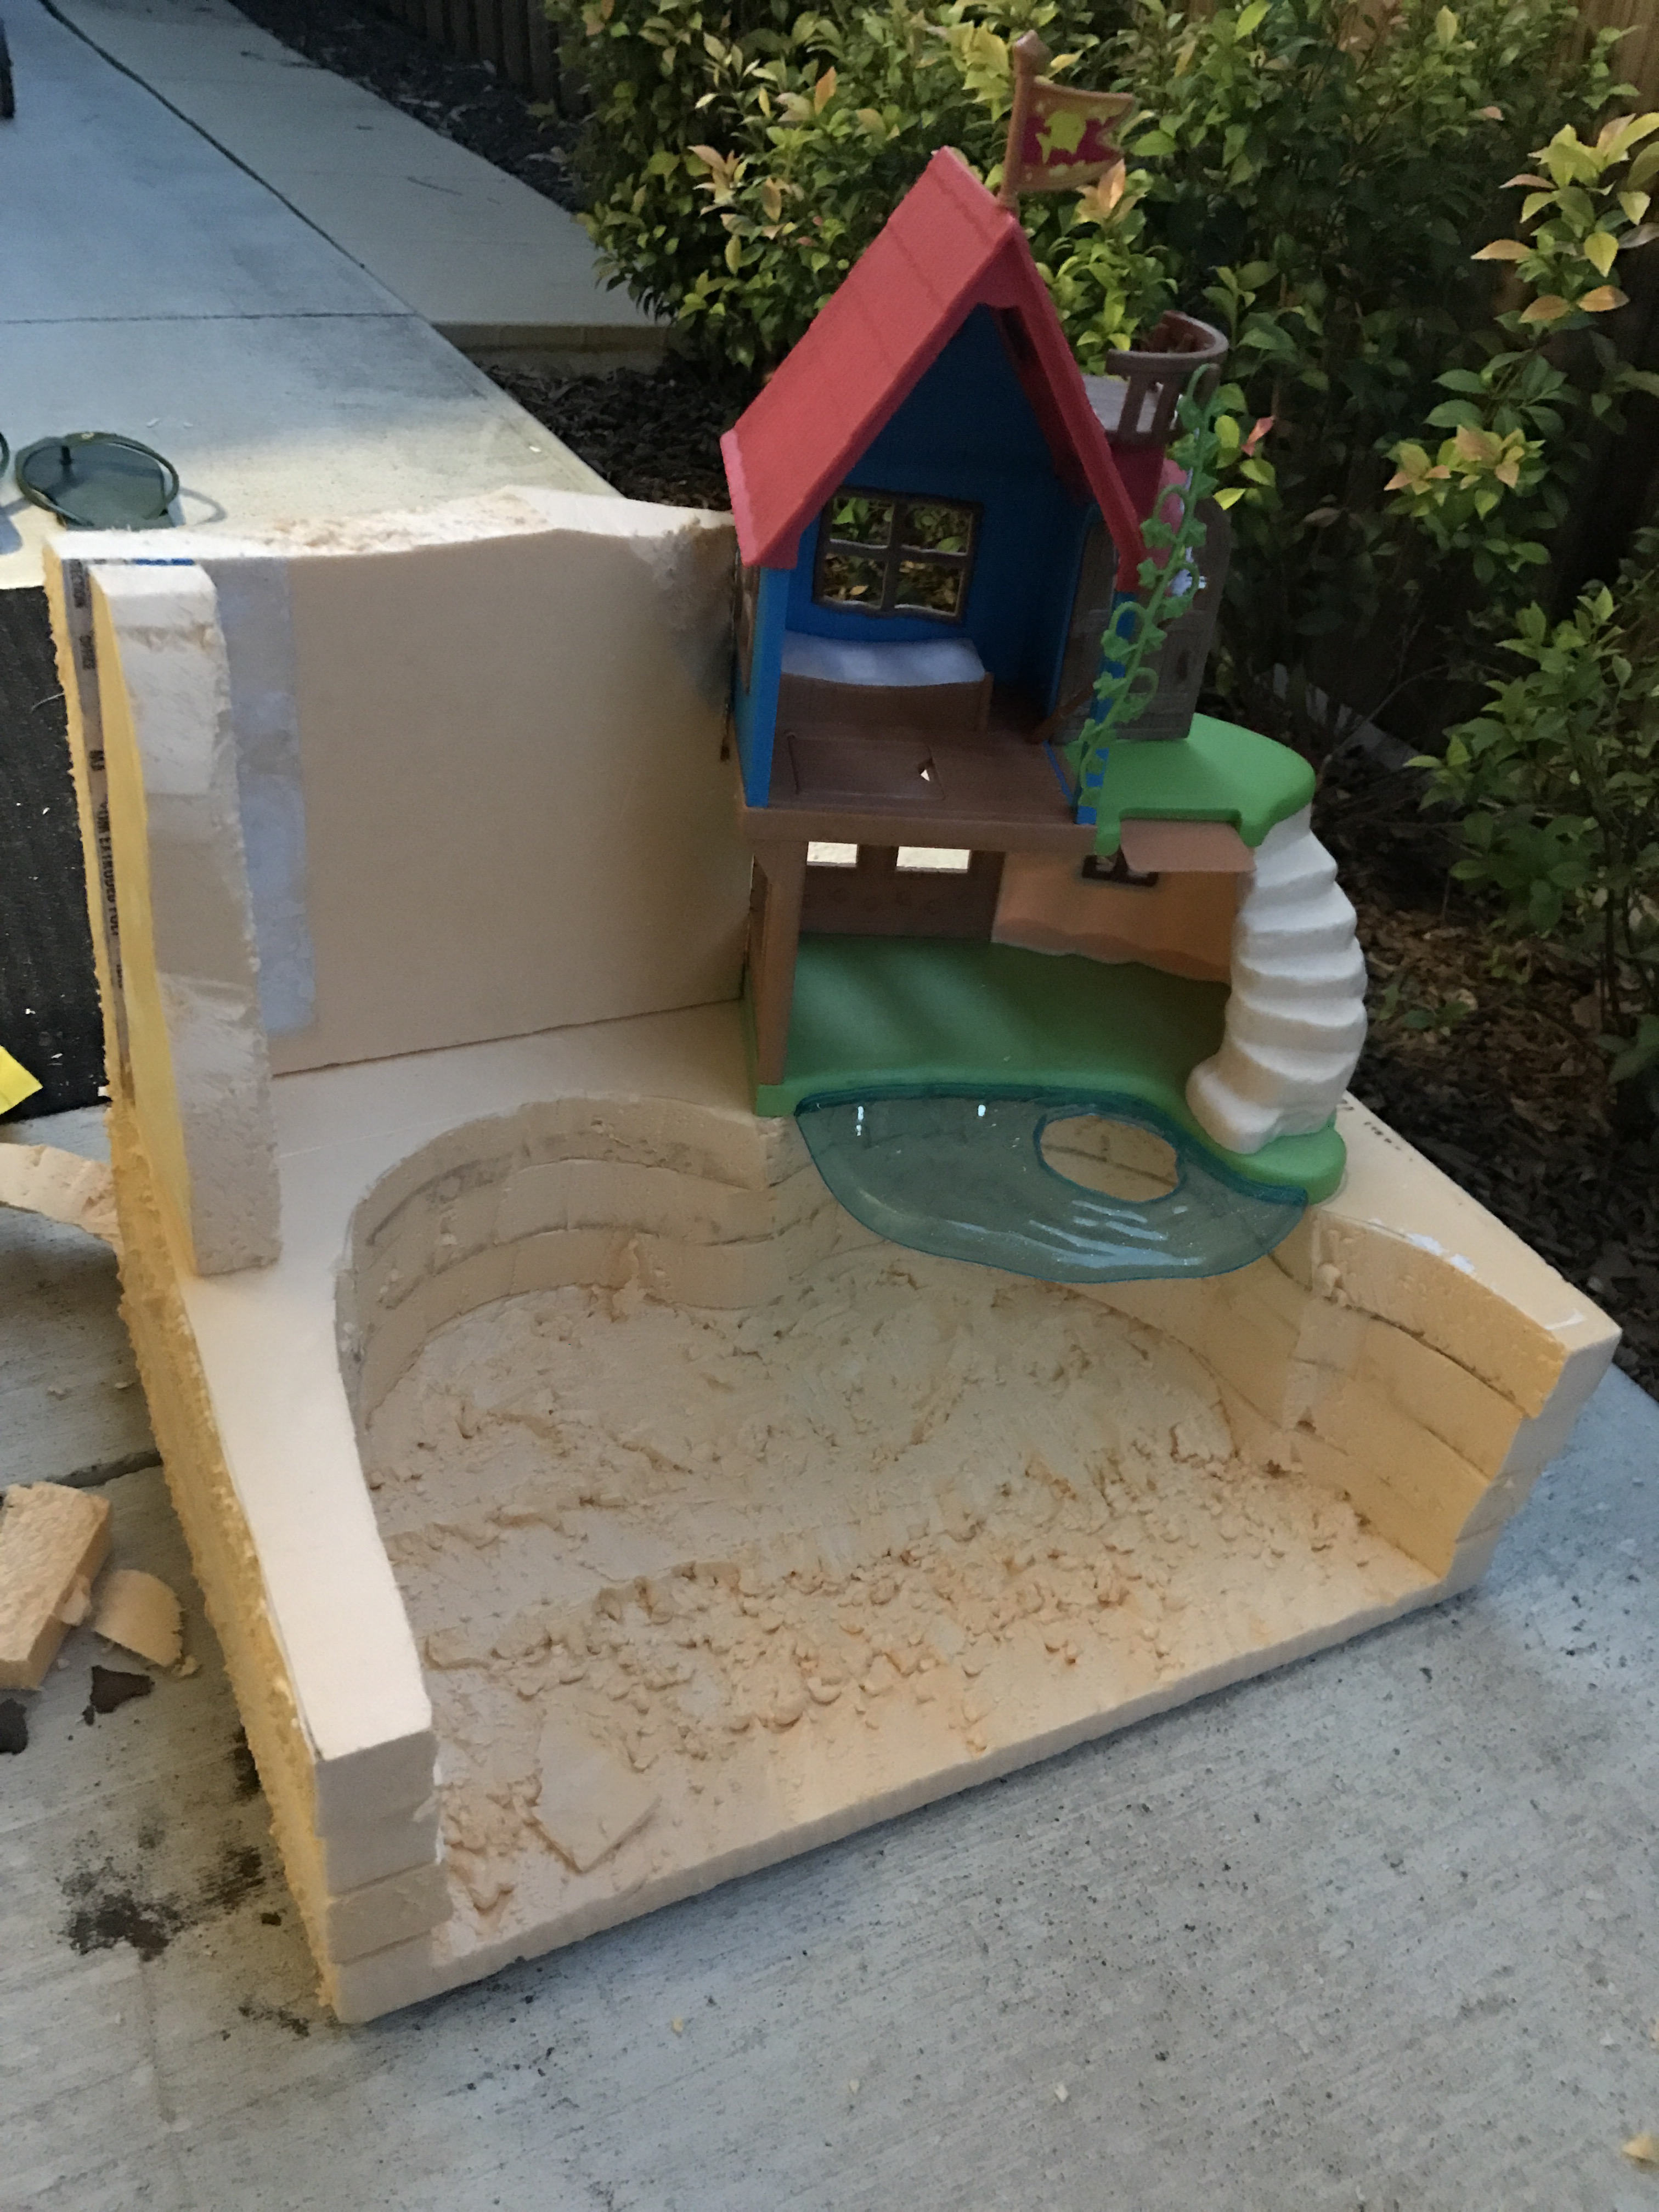
You can see the glued-on sand on the photo below. I did a rough green paint to the areas I wanted covered with grass and decided that the sand would be better painted blue (this was a nerve-wracking step after so much work already – it could have seriously messed it up!). I tried to make it a darker blue colour at the bottom to give the impression of depth, and a lighter blue as it approached the surface.
On the right of this photo you can see I’d also made a removable part for the top of the waterfall “cliff”. I wanted to keep this bit separate to the end in case I messed up the resin pour or waterfall attachment. I also painted this “river” part blue.

Here you can see the underwater part painted blue and the cliffs with their first coat of grey paint. I then brushed on watered-down PVA glue to the green areas and sprinkled with “turf” I’d bought at a craft shop. I did the same technique here I did with the sand i.e. over-spray with glue again then when that dried do another layer of glue, then turf, then a final spray of gue to seal it all.

Here is the glued-on turf drying. You can see the top part better here. I should have made my river less straight-edged. (The river was formed just by doing a shallow carve in the foam with a knife).

In the below photo I am preparing the river for a render pour. You can see I also glued a few pebbles in the river. I followed Ashmimi’s instructions in the beach tutorial for this part (and watched a few render youtube videos). (I made a little pond the day before so I could have a practice run, as it was my first time working with render). I did some temporary hot-glue of plastic offcuts to both ends of the river so the render wouldn’t drip off. This was almost a disaster as the hot glue melted some of the foam (despite being low temp!).

You can see the finished river surface in the photo below. I was really happy with how it turned out. Render is lots of fun to play with!

The most trouble I had was finding the right material for making the waterfall and the water effects on the Perspex. All the online tutorials use an overseas silicone brand called DAP crystal clear that starts off white, is really workable (takes a while to set) but then dries crystal clear. Australia doesn’t seem to have anything like that. All the clear silicones I found were REALLY tough and set almost immediately so I couldn’t feather them to make the waterfall. And the silicones that were more workable ended up being almost white rather than see through.
The general idea was that you lay down silicone on something non-stick like greased baking paper and work it with a fork to feather it and make it look like a waterfall (how hard could it be right?!). I had to do 7 trial runs of the waterfall (using 3 different silicones from the hardware shop!!) before I found something that worked okay!!
Here is one of the trial runs. I also discovered I needed to feather vertically down rather than out as my first few looked like a Christmas tree and rather unrealistic. This particular trial stuck badly to the baking paper and I learned to spray with baking spray to stop it sticking.

Here is the “clear” silicone. You can see I marked the length and width of waterfall I wanted before I laid it out. Man it was DIFFICULT to work with. It kept clumping up into balls and detaching from itself, it set super fast. I was pulling my hair out!! You can see it’s a lot clearer than the waterfall I ended up with but I just couldn’t get the shape right so I gave up on it eventually. Also it was reeeally difficult to detach from the underlying baking paper, no matter how much I greased it first and periodically lifted it whilst drying.

This is a trial of using the silicone on a Perspex offcut to make water effect but it was too opaque for what I wanted. I wanted the water to look really clear (i.e. to be able to see through it easily down to the underwater treasures). You can see my waterfall here was feathered wrongly, it looks odd.

So each time I learned something! It sure was frustrating though haha. In the end I had to use a more opaque silicone than I would have liked as the clearer ones were just too difficult to work with, but I think it works okay.
In terms of the water effects on the surface of the water and the river, the silicone was just not cutting it for me and I found something called Reeves Gloss Gel Medium.

This is a product designed to be mixed with paints to make them more 3D but can be used on its own as a gloss. It takes a while to set but it sets clear. In the thicker parts there is a slight white-translucency to it but that works well with water. Here is some testing I did with it.

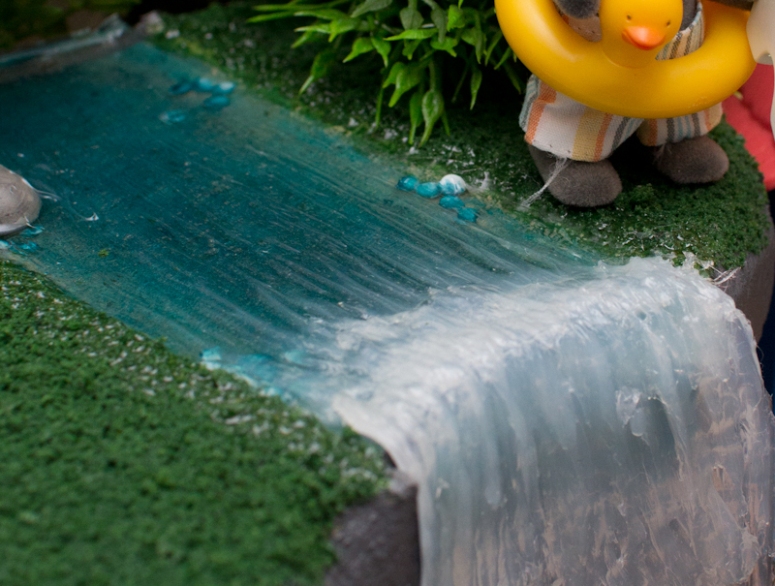
And here it is applied to the river surface to make it look like running water (before it dried clear). Whoops forgot to say I attached the silicone waterfall to the river with more silicon! Hot glue did not “stick” to the silicone.

You can see here how this dried on the river.
Next I used yet more silicone to make the waves/ripples around the waterfall base and the cut-out hole for swimmers. This involved laying the silicone directly on the Perspex around these areas in rings and feathering it up and out with a greased fork. You can see my test of the Reeves Gloss Gel drying in the background and yet another failed waterfall off to the side haha.

After this I applied the Reeves Gloss Gel all over the Perspex and waited for it to dry. I probably could have done the water pattern a bit better but oh well.

And then I put it all together! I added various plants that I’d poached from cheap shops or made myself. Now it’s all ready to set up with figures and accessories. I hung a figure and a fish to the underside of the Perspex connected by clear string and a blob of hot glue (this actually looks really awesome in real life, it’s hard to see the strings and they look suspended under the water) but this will come off easily so I can change that if I want to.

Phew that was a long post haha. Well done if you’ve made it to the end and I’m sure you never want to hear about silicone ever again. I sure don’t!! :p
x Piffle

Thanks for sharing all the steps of this wonderful project. It looks very profesional. The waterfall effect looks great but I can see it wasn´t easy to find the right material. You must be very proud of yourself! Your diorama is amazing!
LikeLike
Thanks so much Cutata, you’re so kind. 🙂 x
LikeLike
Wow! You make it look so easy in the tutorial but in the end, it turns out to look amazing!
LikeLike
Aw shucks thanks Em! 🙂 Definitely was not easy haha. The waterfall had me tearing my hair out.
LikeLike
That’s pretty cool! I’ll have to get some gel medium to try for future projects. I used pva glue to make my ripples, haha. Is it tacky at all after drying? I also assumed you made the waterfall using hot glue, it’s interesting to see how you did it with the gel medium.
LikeLiked by 1 person
Actually the waterfall is not gel medium, it’s silicone. 🙂 I just used the gel medium for the flow effect on the top of the river and the swirls on the perspex for the surface of the water.
The gel medium is not tacky when fully dried but it takes a LONG time to fully dry (at least several days). I did trial PVA glue for my ripples but it never got fully clear, there was still some central whiteness to the ripples after several days.
LikeLike
Oh right! I mis-remembered that step. My ripples did dry clear, but it was a relatively thin layer. I did a resin pour first, and when that set, spread a layer of glue on top. The ripples aren’t really realistic and it’s not waterproof 😛
LikeLike
What did you do that on? Did you do a water scene? I’d love to see!
Yeah my rippley water surface doesn’t look right either, there was probably a better way of doing that…. oh well not a big deal!
LikeLike
I did a seaside base for my seaside restaurant. Also used Ashmimi’s tutorial 😀 http://bbqweasel.blogspot.com.au/2016/03/sea-diorama.html
LikeLike
Sigh as usual I can’t comment on a blogspot blog. I can’t figure out how to do it. I have the same problem with Cutata’s blog – when I try to use my WordPress ID it keeps saying my credentials can’t be verified. Arrrrgh.
Anyway what I was going to say was that’s so cool! What a great idea!! And it looks fabulous! A beach scene is something I hope to do down the track.
LikeLike
I wouldn’t know what’s wrong. I made a separate account for wordpress several years ago. I only remembered I had it when I tried to comment on your blog.
Yeah! I’d love to see what you come up with for a beach scene. I’m thinking that somewhere down the line I’d like to make a larger beach diorama for taking photographs on. The one I made was designed to slot into a shelf and I can’t take photos of the seaside restaurant without the edges showing
LikeLike
This is Amazing!! Very inspiring 🙂
LikeLike
Thanks Rose! 🙂
LikeLike
I am in LOVE with this Secret Grotto set up! Your photos are amazing throughout the blog too….. You’re so creative with your set ups and they are so ”Sylvanian” the way Sylvanians should be!
LikeLike
Aww thankyou so much Jacc! 😀 You’ve made my day! I have so many other ideas and plans in my head, it’s just finding time to do them that’s the problem!
x
LikeLike